Importing users from Active Directory
1. Configuring connection parameters
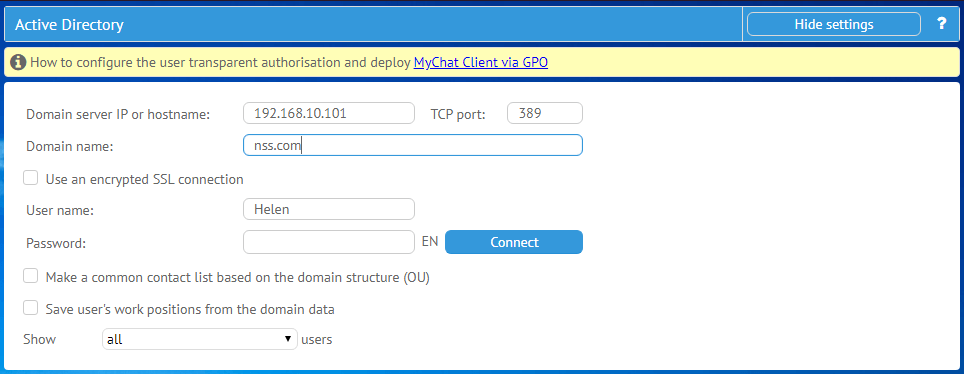
If you need to import users from a domain, the tool Active Directory will help you.
Conditions are quite simple:
- specify IP address or the server's Host (network name);
- by default, TCP port 389 is set for connection via LDAP protocol. You can replace it with any other if you have one;
- enter the domain full name;
- finally, specify the user's name and his connection password.
If the connection is successful, the connection parameters (except the password) will be saved in the server's database and automatically placed when you enter the tool for importing users from Active Directory to avoid writing them manually each time.
2. Result of successful connection
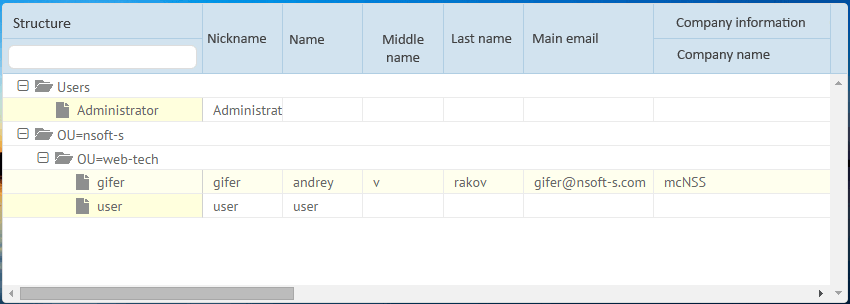
In case of successful connection, the table with a list of available users for import displayed at the bottom. Blocked domain users won't be included to the list.
Select users for importing using a mouse. You can select by holding the button SHIFT (block selection) or CTRL (single selection).
There is a filter for a login in the field "Structure". You can apply filter by department names, if any.
3. Processing connection errors
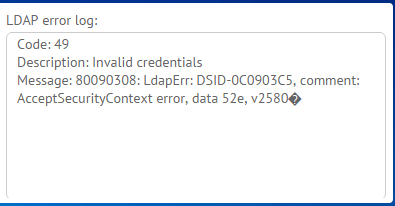
If an error occurs during connection attempt, it will be written in the log on the right of connection parameters.
Description of connection errors.
4. Configuring matching fields
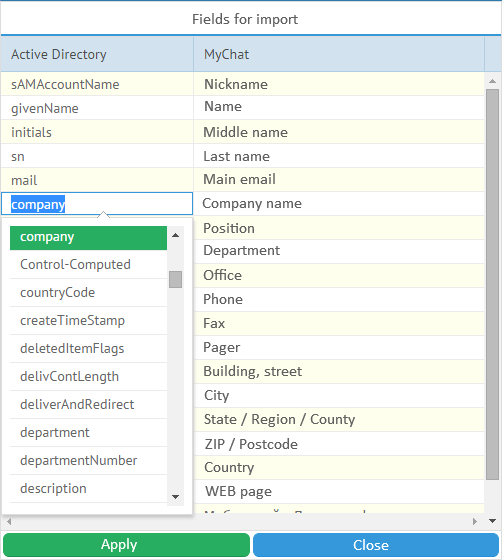
Before importing users, you can specify profile matching fields in a domain and chat server.
For example, a very common case when a middle name is written in another field instead of "initials" as it has the length of only 6 characters. When configuring fields for importing, set up matching fields for a domain and chat.
If you decide whom to import to the chat, press the button "Import".
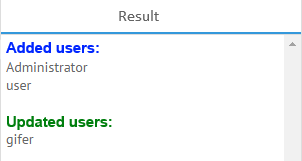
Import result will show you what happened which new users were added and whose information was updated.